Food, mustard seed sentinel

Key Lime Pie

dsc00550

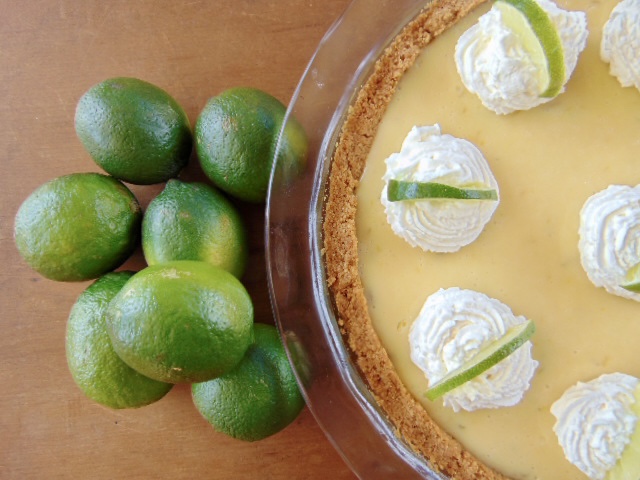
There is something so delightful about a key lime pie. Maybe because it has the perfect amount of tart and sweet. I love all things citrus and key lime pie takes the cake. I mean it takes the pie. What I’m trying to say is that key lime pie is fantastic and this recipe is easy and amazingly good. 

I have been making this mouth-watering dessert for years and it always brings smiles. That makes me happy, which makes me smile too. It fills me up to know that I brought a little joy to someone in the form of a delicious piece of pie. You can’t be angry when you are enjoying a yummy treat. We all just need to eat more desserts.

No key limes are required to make this key lime pie. I have used key limes before and they are not the easiest fruit to work with since they are very small. Also, key limes are not always available at the grocery store. Regular limes work great. 

Make this delectable pie and bring some happiness to your world.


Happy Eating!


You make known to me the path of life; you will fill me with joy in your presence, with eternal pleasures at your right hand. Psalm 16:11
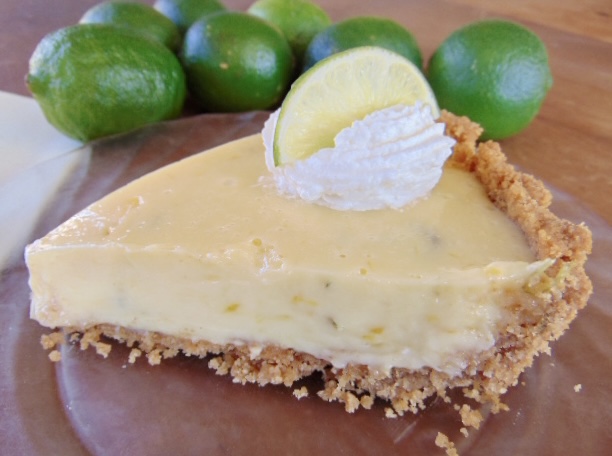
dsc00538

dsc00534

Key Lime Pie

Ingredients

8 egg yolks 

2 cans sweetened condensed milk

The juice of 5 limes (approximately ½ cup) 

Zest of 5 limes (about 1 tablespoon)

For the crust

2 sleeves of graham crackers

14 tablespoons of melted butter


    1. Preheat oven to 325°
    2. Place graham crackers in a food processor and process until finely ground. You can also place graham crackers in a zip lock bag and pound them with a rolling pin until you get fine crumbs. Put the graham cracker crumbs in a large mixing bowl.
    3. Add melted butter to the graham cracker crumbs. Mix until combined. 
    4. Press the graham cracker/butter mixture evenly into the bottom and up the sides of a 9-inch pie pan. Use the back of a measuring cup to firmly press the crust in place. 
    5. Bake the crust for 20 minutes until golden brown. Cool completely.
    6. Reduce oven temperature to 300°
    7. Add egg yolks, sweetened condensed milk, lime juice, and lime zest to a large mixing bowl or stand mixer. Use the whisk attachment and mix on medium to medium high until everything is thoroughly combined. 
    8. Pour the pie filling into the pie crust. Bake for 25 to 30 minutes.
    9. The pie is done when the filling is firm but slightly soft. It won’t be wiggly and it won’t be brown. 
    10. Let the pie cool completely. Wait at least 4 to 6 hours before serving. Refrigerate overnight for the best flavor.


Notes

*If you can find key limes, use a few more than what the recipe calls for since they are small.

*Make this pie a day ahead for the best flavor.

* Buy extra limes to use for garnish. 

* Top with whipped cream.


dsc00567

dsc00545


For this recipe and more go to the link. I write a monthly article for Mustard Seed Sentinel,  Meghan’s Corner. 

https://www.mustardseedsentinel.com/post/meghan-s-corner-key-lime-pie

Food

Cream Cheese Pound Cake

dsc00402

This is my favorite pound cake. It’s delicious and easy. I found this scrumptious dessert years ago in Southern Living magazine. I get asked for this recipe every time I make it. I shared this pound cake when I first started writing for Mustard Seed Sentinel, and wanted to share it again with new followers. 

Enjoy this delightful sweet treat. Life is short. Have a piece of cake.

Happy Eating!

Cream Cheese Pound Cake

Ingredients:

1 ½ cups butter, softened

1 (8oz.) package cream cheese, softened

3 cups sugar

6 large eggs

1 ½ teaspoons pure vanilla extract

3 cups all purpose flour

⅛ teaspoon salt

Directions:

1. Preheat oven to 300°

2. Beat butter and cream cheese at medium speed with an electric mixer for 2 minutes or until creamy; gradually add sugar, beating until mixture is light and fluffy.

3. Add eggs one at a time, beating until combined. Add vanilla extract, beat until blended.

4. Combine flour and salt in a small bowl; gradually add to butter mixture, beating at low speed just until blended after each addition. Don’t over mix.

5. Pour batter into a greased and floured 10-inch bundt pan or tube pan.

6. Bake for 1 hour and 25 to 30 minutes or until toothpick inserted in center comes out clean. Cool on a wire rack for 15 minutes. Remove from pan, and let cool completely for about an hour.

Notes:

~I prefer to use three loaf pans. Cooking time drops to approximately 1 hour 5 minutes when using loaf pans. You can freeze the loaves. Thaw before serving.

~Reduce the sugar to 2 ½ cups or 2 ¾  if 3 cups is too sweet. It still comes out yummy.

Food

The Best Sugar Cookies

dsc00246

These are the best sugar cookies, ever! You may not believe me. A sugar cookie is a sugar cookie. I disagree. I have had many beautifully decorated sugar cookies that taste quite bland with a dry texture. This amazing simple recipe is full of flavor with a nice soft texture.

My family absolutely loves these cookies. I usually make them for holidays and special occasions. I have zero decorating skills. My cookies are very homemade looking. But, they taste so good. 

A lot of the fun of homemade sugar cookies is the decorations. My boys always helped when they were little. Each cookie was a tiny canvas for them to express themselves with icing and sprinkles. If you have kids they will love creating their own edible masterpieces.

I have used buttercream frosting, and a corn syrup based frosting. The best decorating icing is royal icing. It sets up perfectly for stacking and the decorating possibilities are endless. My cookies in the picture have corn syrup icing. It sets up similar to royal icing, but it’s much runnier. It’s not the easiest icing to work with, but I didn’t have the ingredients for royal icing so I had to make do. 

You can find the recipe for royal icing here: Gingerbread Cookies

Enjoy this easy, no refrigeration required, sugar cookie recipe.

Happy Eating!


Sugar Cookies 


Ingredients

1 cup butter 

1 teaspoon vanilla

¼ teaspoon almond extract

1 cup sugar

2 eggs

½ teaspoon salt

½ teaspoon baking soda

2 teaspoons baking powder

3 cups flour


Directions

  • Preheat oven to 375° 
  • In a small bowl add salt, baking soda, baking powder, and flour. Whisk together.
  • Cream the butter and sugar in a large mixing bowl or stand mixer. Add vanilla, almond extract, and eggs. Mix on medium high speed until combined. It will look lumpy from the eggs. That’s OK.
  • Add the flour mixture to the butter mixture. Mix on medium high speed until combined. 
  • Roll out the dough on a floured surface. Use your favorite cookie cutters and transfer to a baking sheet, and place them about 1 inch apart.
  • Bake for 8 – 10 minutes. The sugar cookies should be light in color. If the edges are brown they are over-cooked. 
  • Leave the cookies on the trays for about a minute before removing them to a cooling rack. 
  • Cool completely and decorate.

Notes:

  • If the dough is a bit sticky, just place it in the refrigerator for a few minutes.
  • Oven temps vary so keep an eye on the first batch or two of cookies until you see how your oven cooks.
  • Place your oven rack in the middle so the cookies bake evenly.
  • Line your baking sheets with parchment for easy clean up. You can also just bake the cookies directly on your ungreased cookie sheets. 
  • I always use salted butter for all my baking. 


Sugar Cookie Icing


Ingredients

1 cup powdered sugar

2 teaspoons milk

2 teaspoons light corn syrup

¼ teaspoon almond extract


Directions

  • In a medium bowl blend sugar and milk until smooth.
  • Add corn syrup and almond extract. Beat until smooth and shiny.
  • Use food coloring to make whatever colors you prefer.


Notes:

  • This is very runny icing. The texture reminds me of white school glue.
  • Use a small amount on each cookie. If you put too much of the icing it will run over the edge of the cookies.
  • It will set up overnight.
  • If the icing is too thick add more milk and corn syrup in about the same ratios.
  • I usually just play around with the texture until I get the consistency I want.

Faith, Food, Uncategorized

Millionaire’s Shortbread

img_2796

One bite of this rich dessert won’t make you wealthy, but it will make you smile. Buttery shortbread crust, a soft caramel center, topped with dark chocolate, and a sprinkle of sea salt make this bar worth a million. I would pay top dollar at a bakery for this delicacy.

Do you like Twix candy bars? This decadent little bar is similar, but even better than the store bought treat. It’s worth the effort to make these indulgent goodies. The trickiest part is the caramel. If you cook the caramel for too long it will be tough. It’s also quite easy to burn caramel. Just follow the directions for the caramel, and you’ll do fine.

Let me encourage you in your cooking and baking endeavors. Each winter I teach a cooking class to kids ages twelve and up. My students this year, most of whom had never cooked, made this recipe. They did a phenomenal job. There was no burned caramel. The kids all cooked it beautifully. If they can do it, and I can do it, you can do it too. 

Millionaire’s shortbread is a special treat that lives up to its name. Make it for your family, your friends, your neighbors, or anyone who could use some happiness. Chocolate and caramel are always a winning combination.

Happy Eating!


Delight yourself in the Lord,

 and he will give you the desires of your heart.

Psalm 37:4 


img_2786

Millionaire’s Shortbread


Shortbread Crust

¾ cup butter (softened)

⅓ cup sugar

1 ⅓ cup flour


Caramel

½ cup butter

½ cup brown sugar 

½ cup sweetened condensed milk

2 tablespoons regular pancake syrup 


Chocolate

1 ½ cups dark chocolate chips

1 tablespoon butter 


Directions:

1. Preheat oven to 350°

2. Line an 8 x 8 baking dish with foil or parchment and leave enough over the edges to create a sling. This will make it easy to take it out of the pan and cut into bars.

3. Make the shortbread crust:

Mix the butter, sugar, and flour with a spoon until small crumbs form. Press evenly into the bottom of your pan.

Bake for 20 minutes until lightly golden brown.

Cool completely before adding caramel.

4. Make the caramel:

In a medium saucepan place butter, brown sugar, sweetened condensed milk, and syrup. Heat everything on low heat until the butter melts. Then turn up the heat to medium/medium high & bring it to a boil. Stir continually. (Be careful because caramel can burn easily) Once it’s at a boil, turn down to a simmer and stir continually until caramel turns an amber color & is slightly thickened. Turn off the heat & immediately pour hot caramel over the cooled crust. Cool before adding the chocolate.

5. Melt the chocolate:

Combine the chocolate and butter in an oven safe glass bowl. Melt in the microwave for 90 seconds total. Stop every 30 second and stir the chocolate. Pour the melted chocolate over the caramel layer. Let it set up completely before cutting. 

Optional: top with sea salt.


Notes

*Make the crust and cool completely before you make the caramel. If not, the crust will tear when you add the caramel.

*If the caramel gets little brown bits, it’s OK, it will still taste good.

*Place the shortbread in the refrigerator between layers to speed up cooling.

img_2799


You can read this article at the link below, and get all of my recipes on Mustard Seed Sentinel. Go to More and scroll down to Meghan’s Corner.

https://www.mustardseedsentinel.com/post/meghan-s-corner-millionaire-s-shortbread