Food, Uncategorized

Butter Swim Biscuits

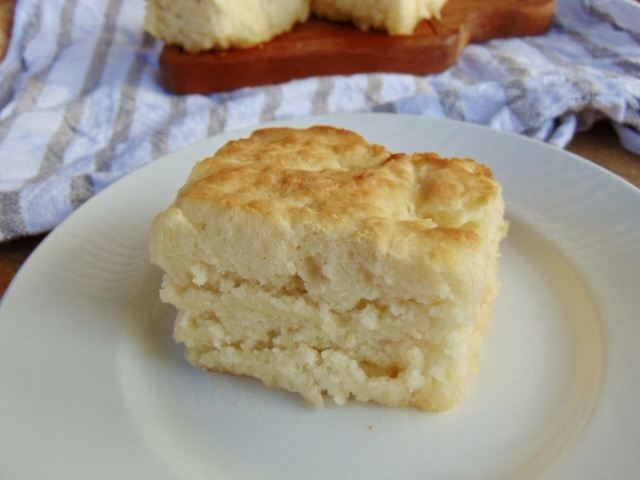
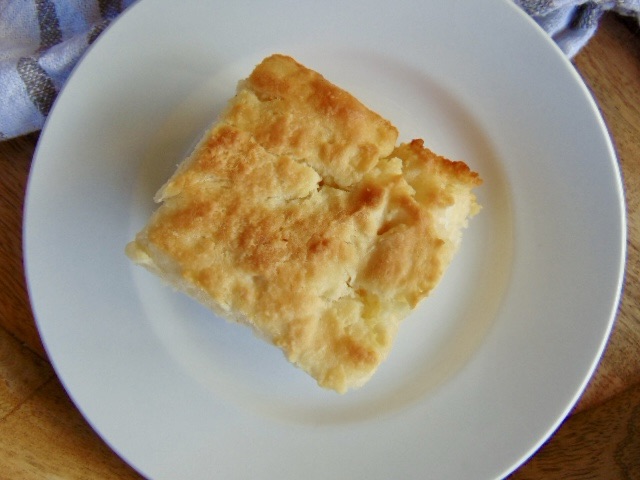
These biscuits are easy to make and so delicious. This recipe is simple, and no fuss, with wonderful results. Fluffy, buttery, flaky biscuits will come out of your oven after a few simple steps. If you do not normally bake, these biscuits could change that.

Yes, the dough is swimming in butter while they are cooking. All that beautiful butter absorbs into the dough creating the perfect biscuit with a crispy crust. You don’t have to fold or knead the dough. Just combine and voila.

I love the versatility of biscuits. Top them with sausage gravy, or make breakfast sandwiches, or add some butter and honey. Biscuits are great for holidays or any day. Classic biscuits are a winner and this recipe is a home run. Enjoy!

Happy Eating!

This is the day that the LORD has made; we will rejoice and be glad in it. Psalm 118:24

Butter Swim Biscuits 

Yield: 9 biscuits

Ingredients

½ cup butter 

2 ½ cup all purpose flour

4 tsp. baking powder

4 tsp. granulated sugar

1 tsp. salt

1 ¾ cups buttermilk


Instructions

  1. Preheat the oven to 450°.
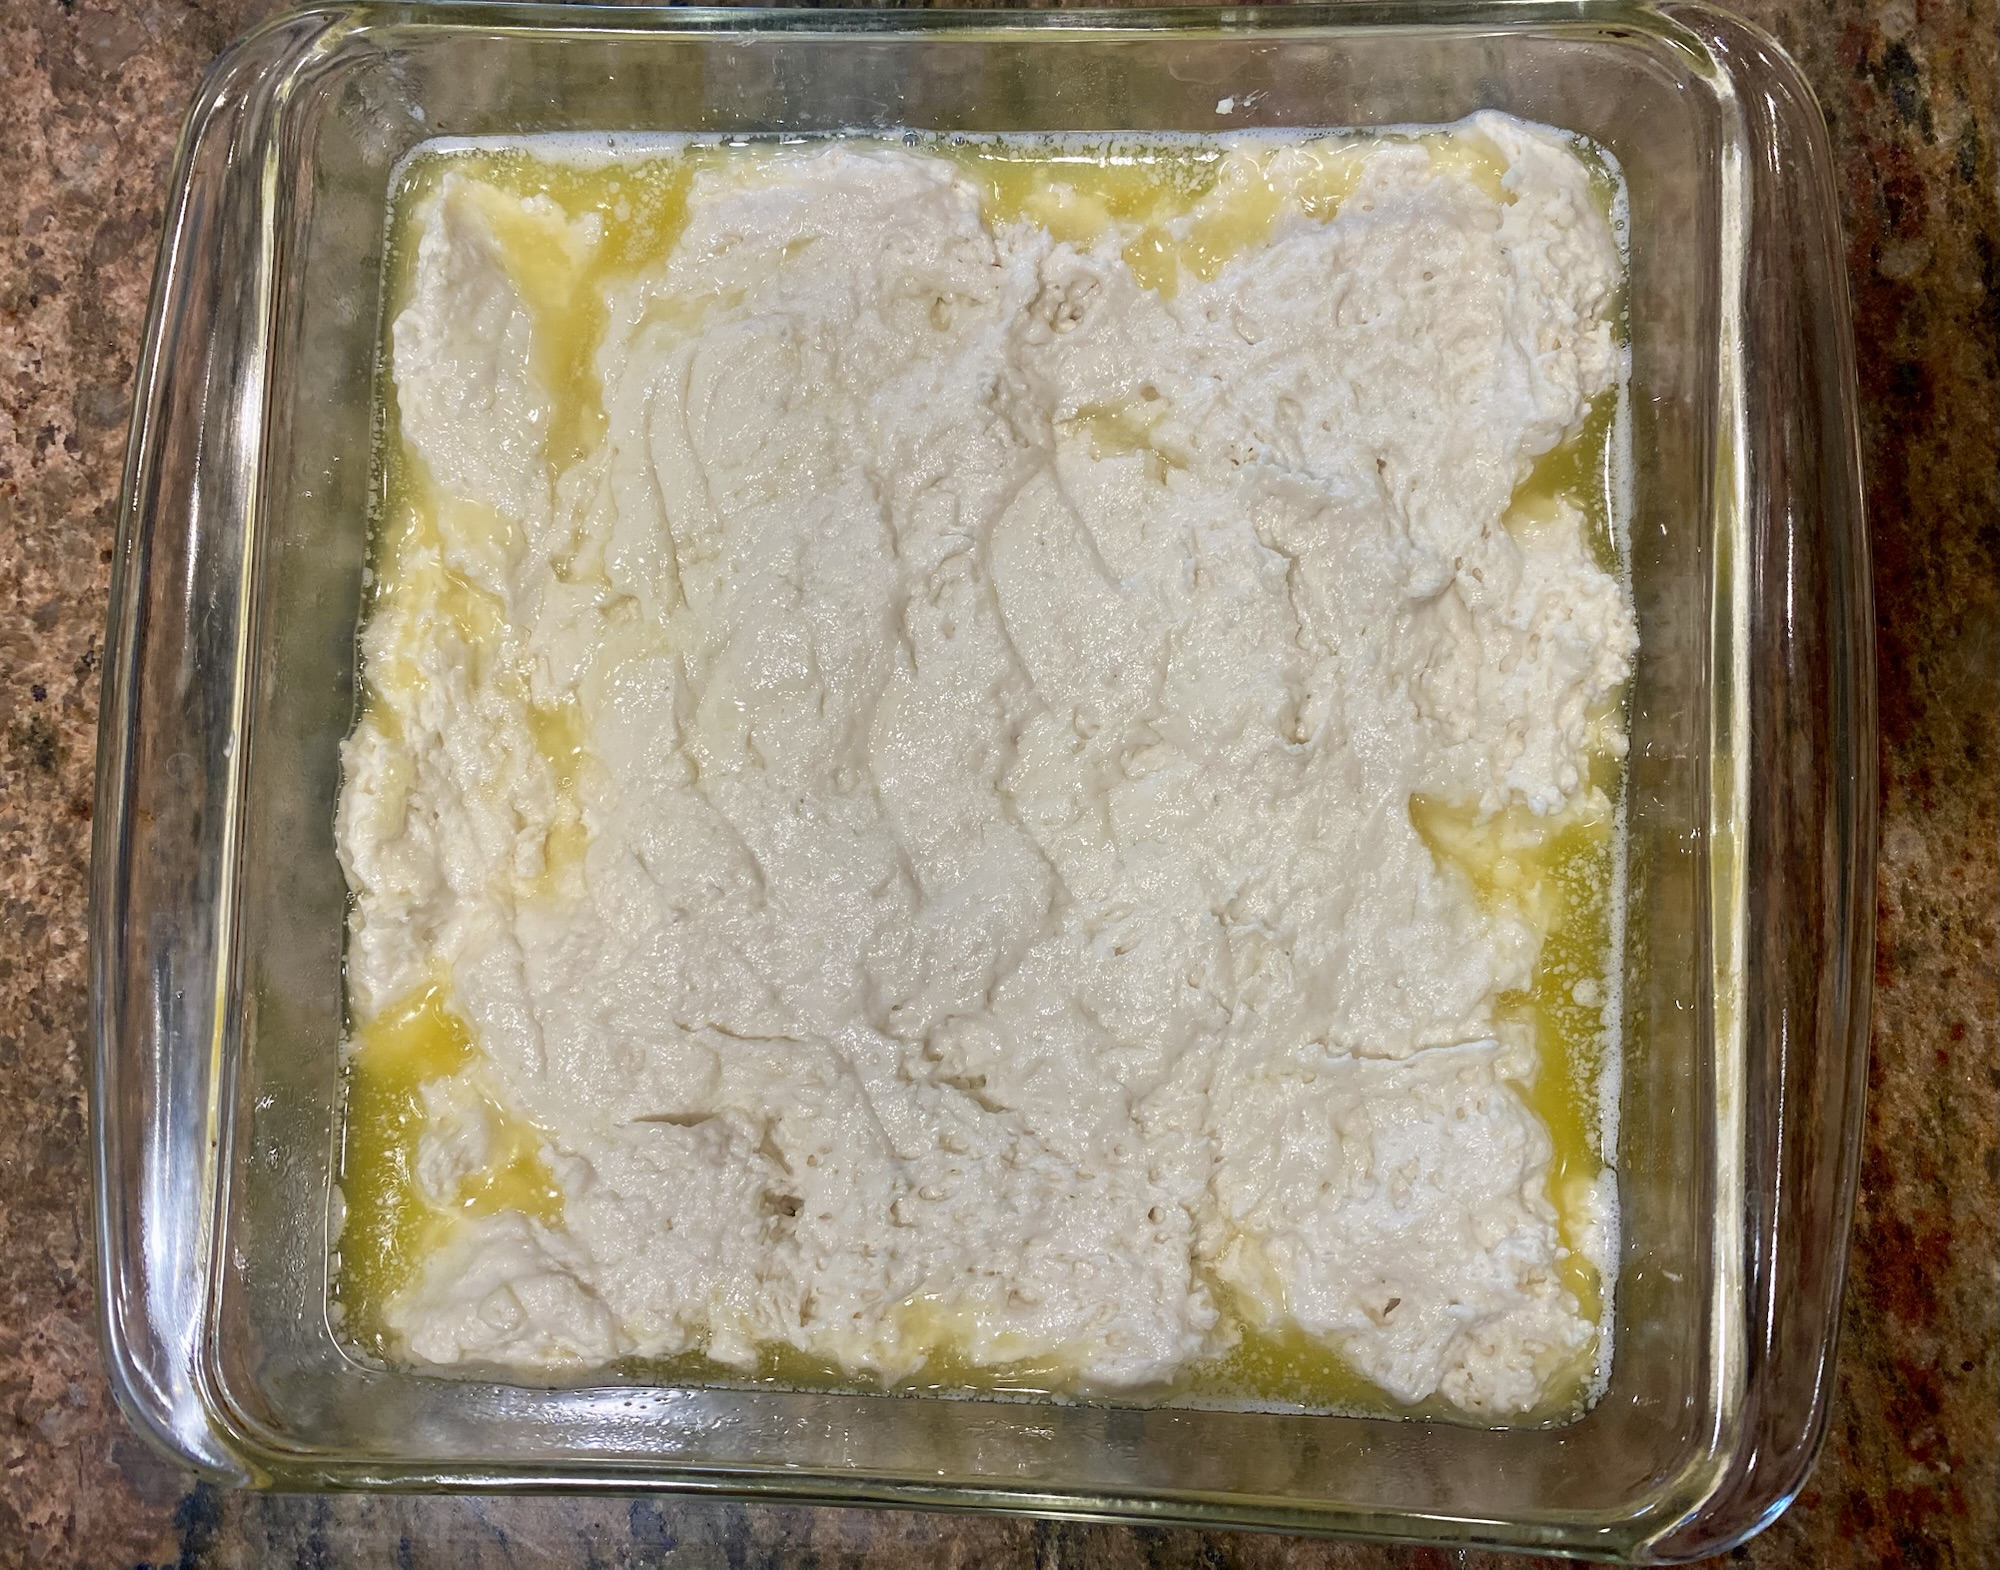
  2. Melt the butter and pour into an 8X8 baking dish.
  3. In a large mixing bowl whisk together flour, baking powder, sugar, and salt. 
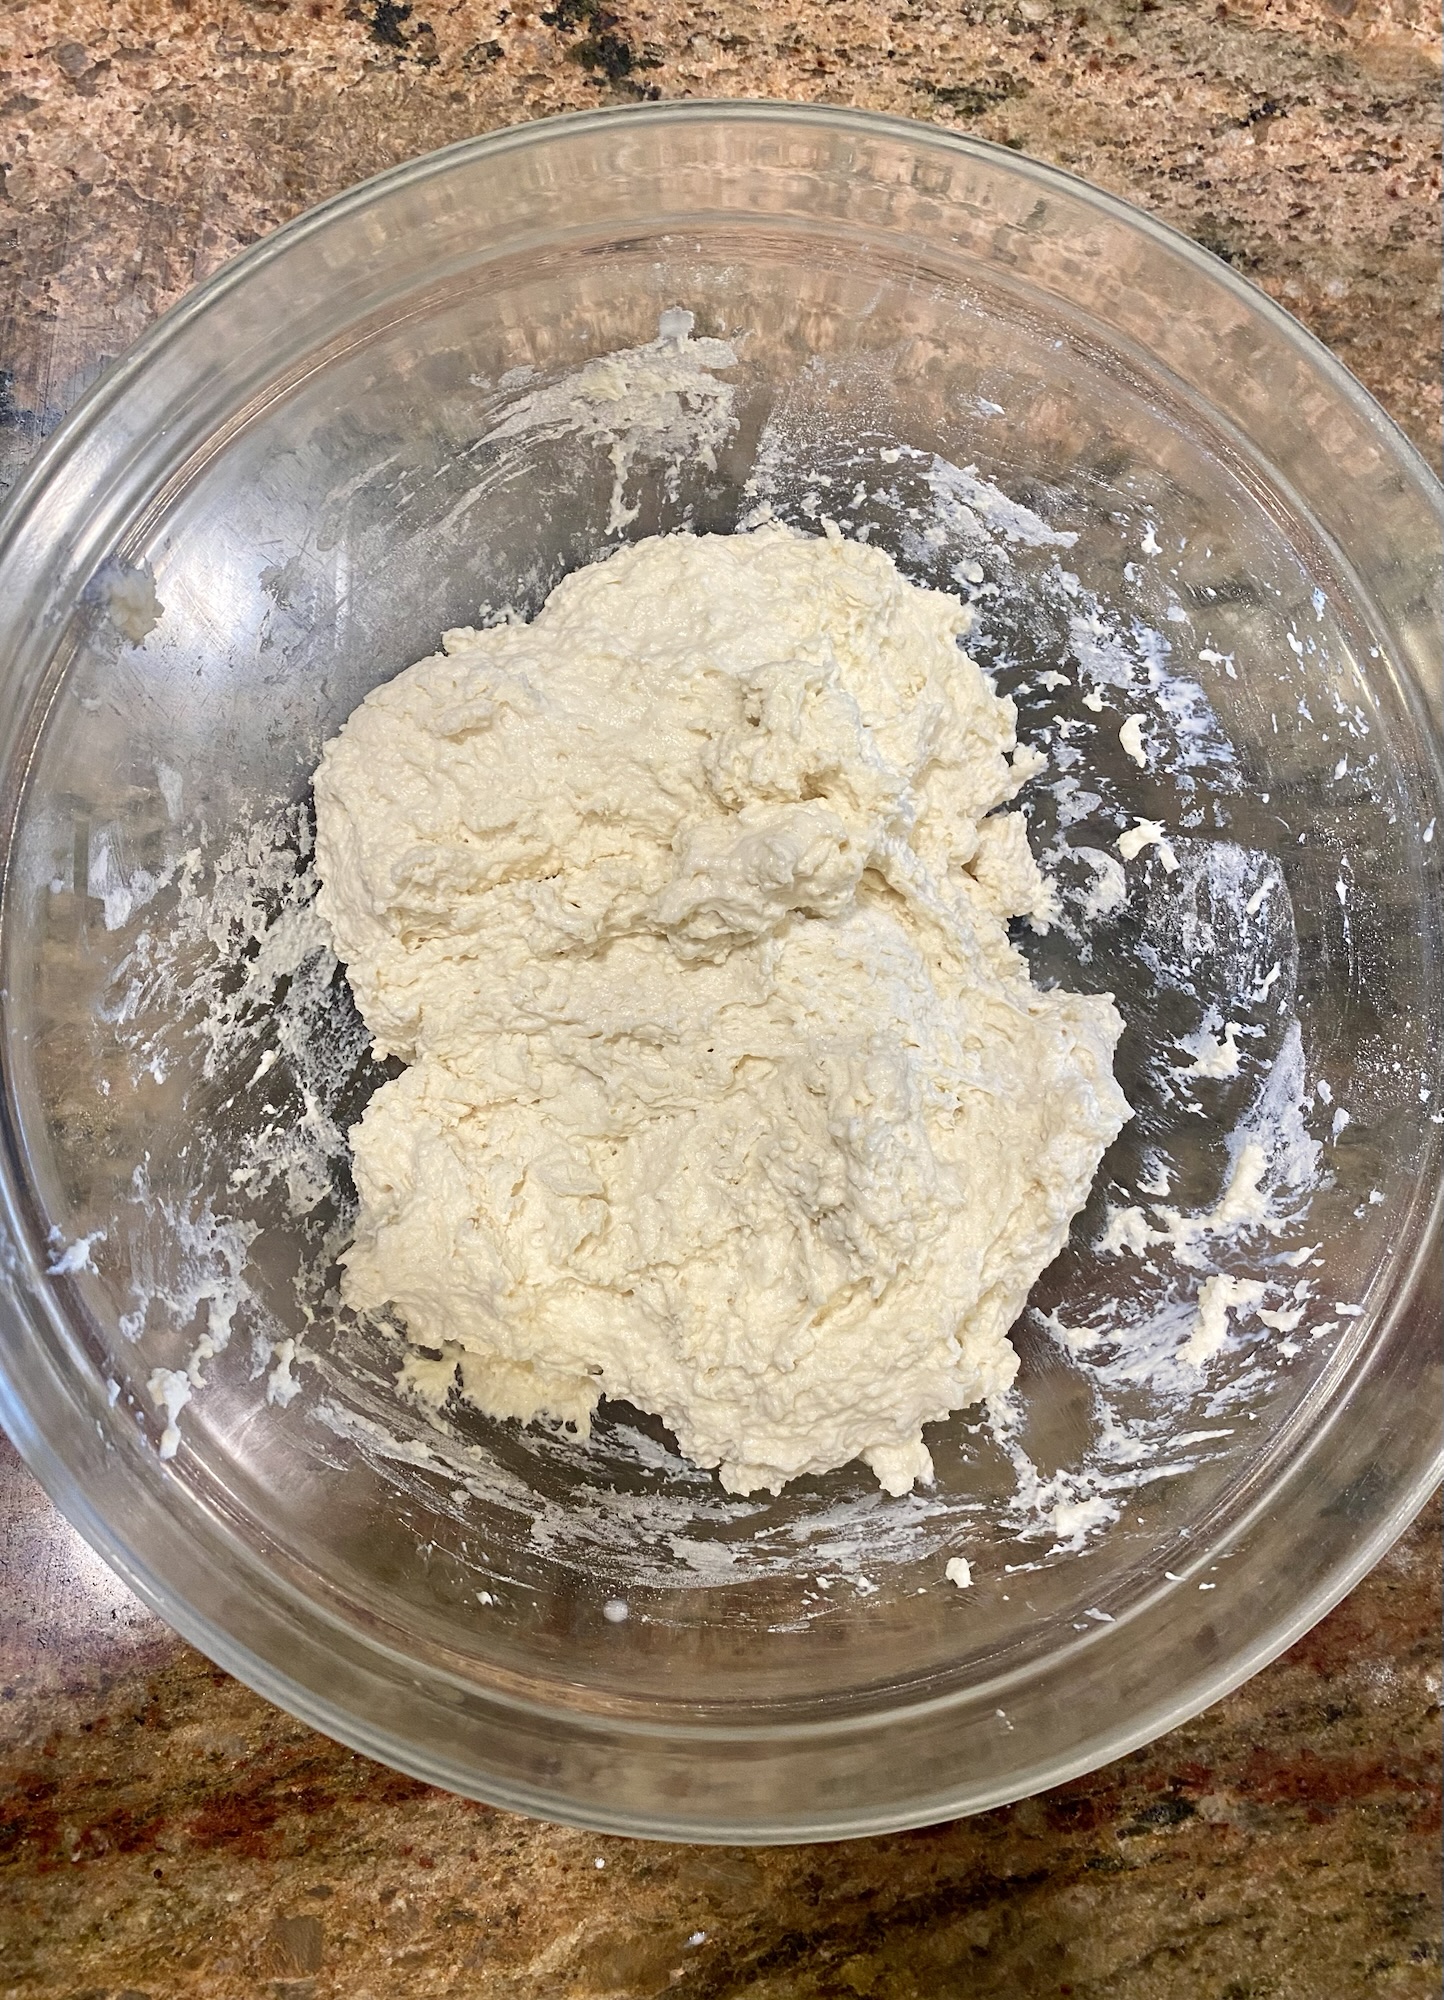
  4. Add the buttermilk to the flour mixture and mix until just combined.
  5. Drop the biscuit dough by spoonfuls into the butter filled baking dish.
  6. Carefully spread the dough evenly across the pan.
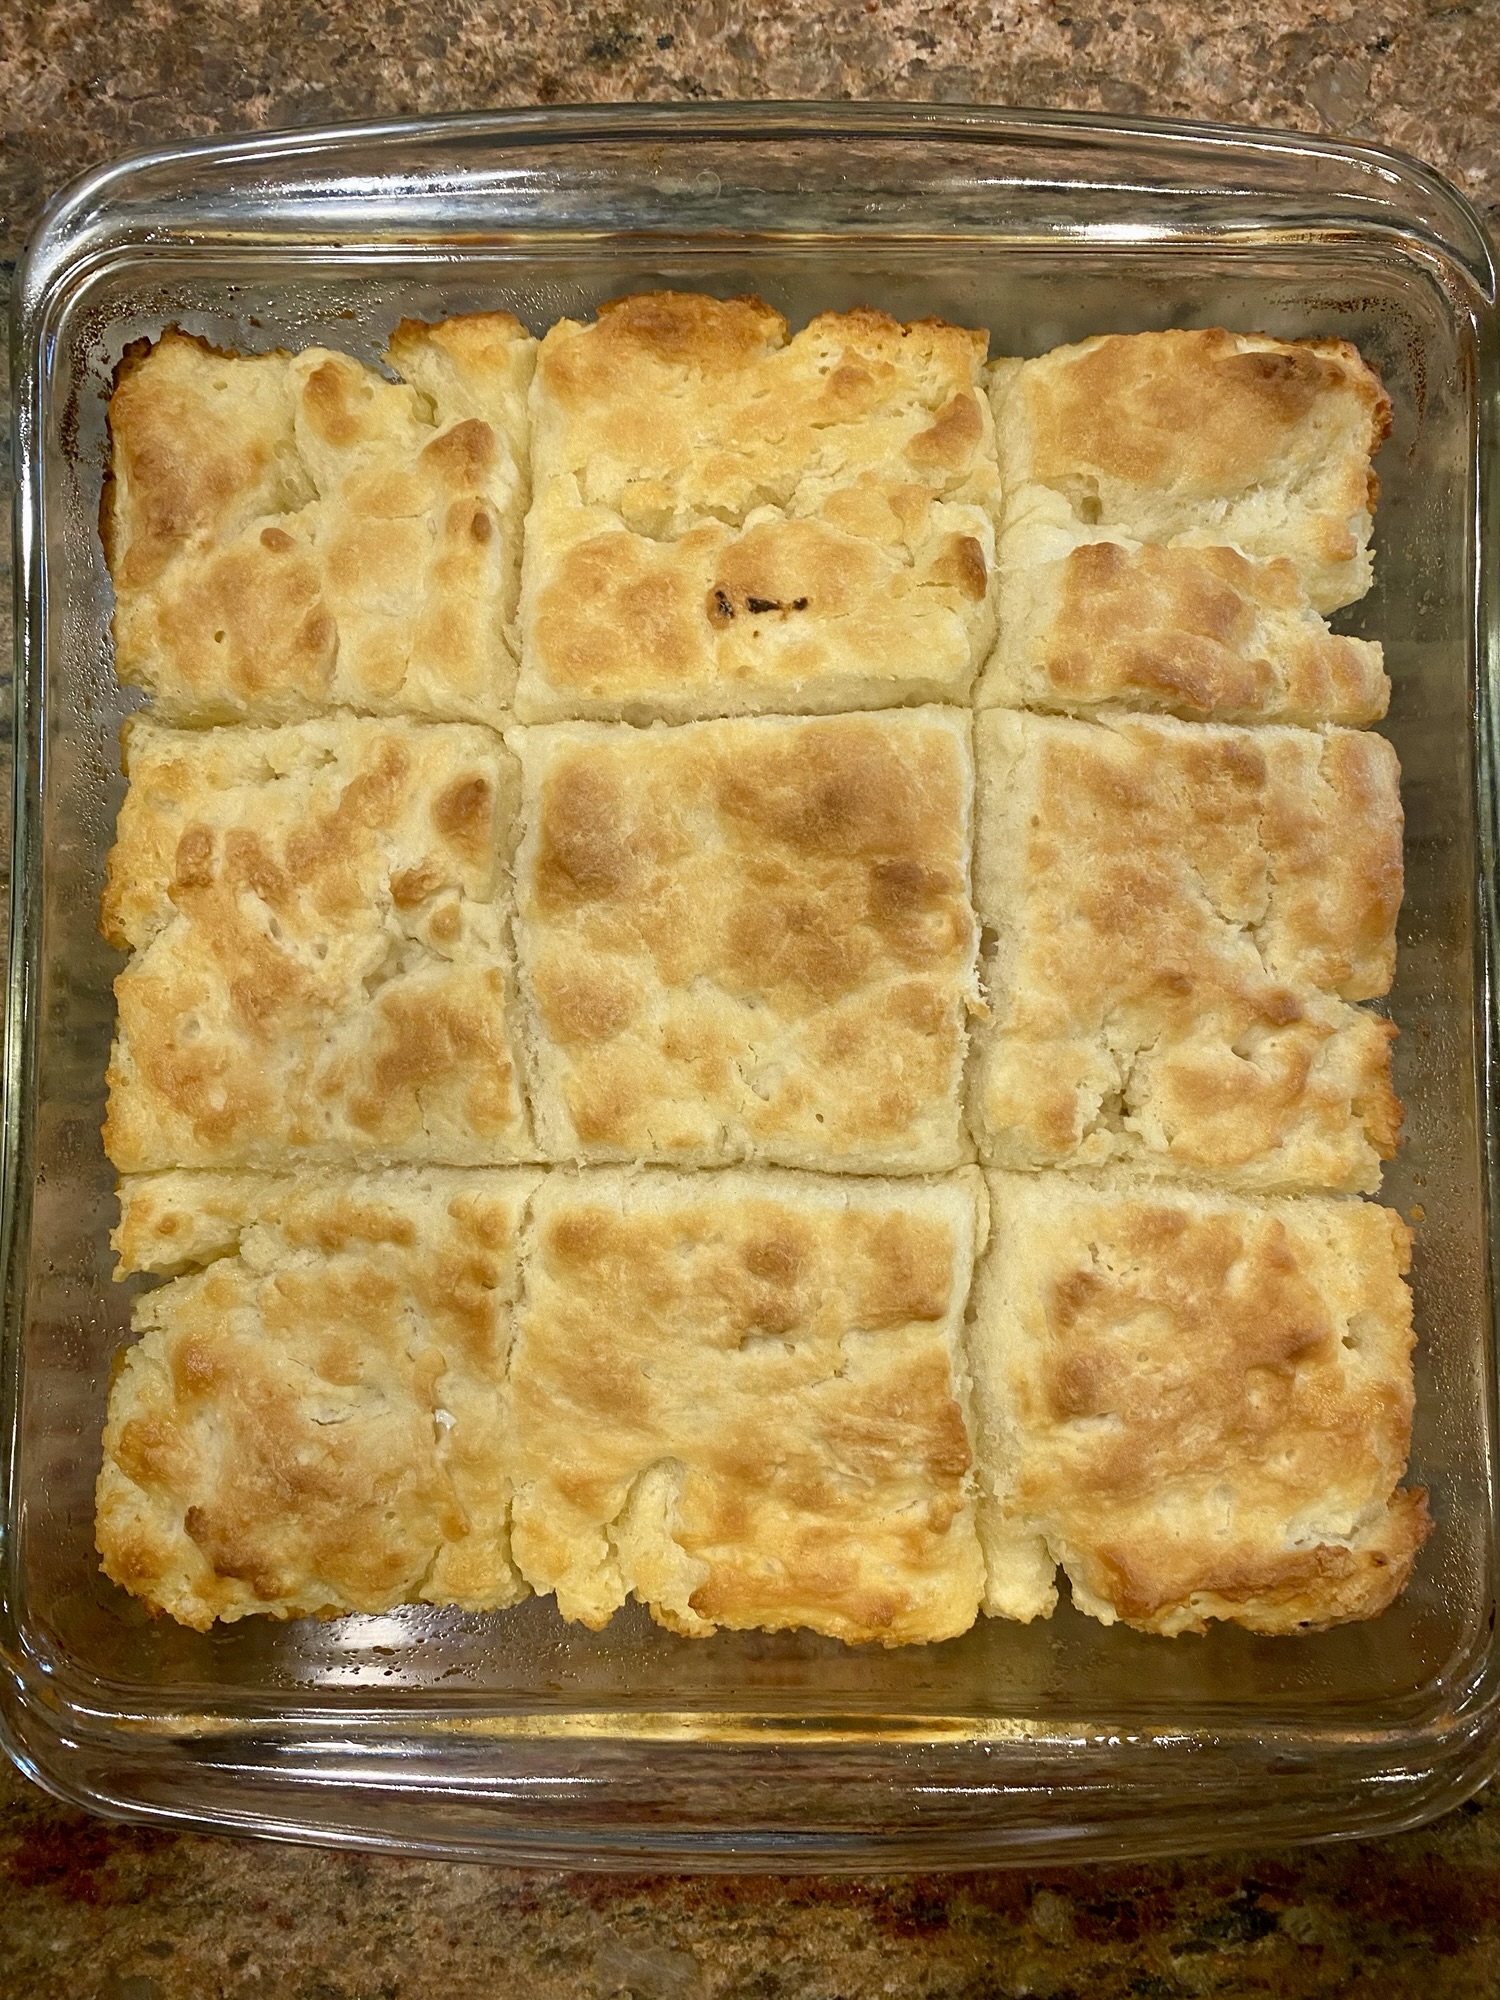
  7. Use a bench scraper and cut the dough into 9 equal squares.
  8. Bake for 20 to 25 minutes, until golden brown on top.


Notes 

  • I recommend spraying the baking dish with cooking spray before you add anything. It is not required, but the biscuits will stick to the pan with no spray.
  • The dough is very sticky. When you add the dough to the baking dish with melted butter it’s easier to drop it into 9 equal piles, then spread it out. 
  • I always bake with salted butter, use unsalted or salted butter. It’s up to you.
  • You can melt the butter right in the baking dish in the microwave.
  • This recipe doubles easily and bakes well. 


Food

Pumpkin Mousse

dsc01084-1

If you love pumpkin like I do, but want something different, then this mousse will satisfy that desire. It’s easy, light, and deliciously sweet. You could layer this pumpkin mousse in a trifle, use it as a pie filling, or just eat it all on its own. Do whatever you like with this amazing mousse, just please make some. It’s so good!

This pumpkin mousse would be a wonderful addition to a Thanksgiving dessert table. I made little portions in small glass containers. Easy to grab, and small portions mean less guilt with plenty of room for other desserts. Or grab two because you should. I love dessert so I say life is too short to not enjoy a sweet treat. Enjoy this yummy pumpkin mousse.

Happy Thanksgiving!

But thanks be to God! He gives us the victory through our Lord Jesus Christ. 1 Corinthians 15:57 

dsc01091-1

Pumpkin Mousse

Yield: 6 cups

Ingredients

1 (3.4 oz) package instant vanilla pudding mix

1/2 tsp. cinnamon

1/4 tsp. nutmeg

1/4 tsp. ginger

1 cup milk

1 (15 oz) can pumpkin puree

2 Tbsp. maple syrup

1 tsp. vanilla

1 pint (16 oz) heavy cream

Instructions

  1. In a large mixing bowl whisk together the pudding mix, cinnamon, nutmeg, and ginger.
  2. Add milk, pumpkin puree, maple syrup, and vanilla. Beat until smooth and well combined.
  3. In a separate bowl, whip heavy cream until stiff peaks form.
  4. Gently fold in 1 1/2 cups of the whipped cream to the pumpkin mixture.
  5. Pipe the mousse into serving bowls. Top with remaining whipped cream and a sprinkle of cinnamon. Enjoy!

Notes

  • Add 1 or 2 tablespoons of granulated sugar to the heavy cream before whipping if you like a sweeter whipped cream.
  • Store in the refrigerator for up to 4 days.

dsc01088-1

Christmas, Food

Russian Tea Cakes

dsc00677

When I was a kid my mom called these delightful little cookies snowballs. It’s a cute name that perfectly describes these bite sized treats. Years later I was given this recipe for Russian tea cakes, and I’ve been making them ever since.

These are a favorite of my family at Christmas time. With a few simple ingredients you’ve got a wonderful buttery, crunchy cookie. They look so festive, like snow. A perfect holiday goody.

Walnuts add a delectable crunch. I highly recommend toasting the walnuts. This will add another depth of flavor to the tea cakes. Savory nuts and sweet powdered sugar come together perfectly in Russian tea cakes. These marvelous cookies will make a lovely addition to your holiday desserts.

Happy Eating!

For there is born to you this day in the city of David a Savior, who is Christ the Lord. Luke 2:11 


dsc00665

Russian Tea Cakes


Ingredients

1 cup softened butter

½ cup powdered sugar

1 teaspoon vanilla

2 ¼ cups flour

¼ teaspoon salt

¾ cupped chopped walnuts

2 cups of powdered sugar for rolling the cookies


To Toast Nuts

  1. Preheat oven to 350°
  2. Spread nuts on a baking sheet and toast in the oven for 8 to 10 minutes. 
  3. Toast until browned. Keep a close eye on them as nuts can burn easily.


Instructions 

  1. Preheat oven to 400°
  2. Line baking sheets with parchment, or leave them ungreased.
  3. In a medium sized mixing bowl use a hand mixer to cream butter, powdered sugar, and vanilla thoroughly.
  4. Add the flour and salt. Mix until combined.
  5. Stir in the chopped walnuts.
  6. Cover and chill the dough for 20 minutes, or up to overnight.
  7. Roll the dough into 1 inch balls and place on a baking sheet.
  8. Bake for 8 to 10 minutes or until golden brown.
  9. In a small bowl place the 2 cups of powdered sugar.
  10. While still warm, roll the cookies in powdered sugar.
  11. Cool the cookies, and roll one more time in the powdered sugar.

dsc00661

dsc00663

Notes

  • Pecans, and almonds can be used. 
  • Russian tea cakes can be kept in the freezer for up to 2 months.
  • Coat with powdered sugar before serving.

dsc00666

dsc00671

Food, Uncategorized

Charcuterie Board

IMG_0823

Charcuterie (pronounced shar-koo-tuh-ree) is the French word for pork-butcher shop. Now say charcuterie ten times. It’s the art of preparing cured meats. In fifteenth-century France, charcutiers shop windows were filled with all sorts of cooked and cured pork since they were not allowed to sell uncooked pork. French charcuterie involves pates, mousse, and things like rillettes. 


Today, charcuterie has taken on a whole new meaning. It’s no longer just meat. You can find charcuterie everywhere from Instagram to restaurants. It’s made a comeback and I am thrilled. This is my kind of eating. Unpretentious, grab what you like, kind of eating. The sky’s the limit with what foods you place on your charcuterie board.


There are no rules or complicated recipes to follow. You can use cutting boards, plates, or a large serving tray like I did. Add cured meats, cheeses, bread, fruit, nuts, or whatever suits your fancy. And, there is no cooking involved! Charcuterie can be a creative appetizer or a meal. I had so much fun making this charcuterie board and I hope you will make one too.


Wow your guests during the holidays with charcuterie.  They will think you are the coolest host in the world. No more spray cheese and stale crackers for you. Not that cheese from a can is all that bad on occasion, but this time you’re going big. You’re going grand. It’s time to change things up when it comes to appetizers. If you’re not ready to take the leap, then by all means stay safe. But, I really hope you at least try and make your own charcuterie board. You won’t be disappointed. 


Happy eating!


The Lord bless you

    and keep you;

the Lord make his face shine on you

   and be gracious to you;

the Lord turn his face toward you

    and give you peace.

Numbers 6:24-26

  IMG_0828


Charcuterie Board

Here is the list of food I used for my board:


  • red grapes
  • strawberries
  • dried cranberries
  • blackberry preserves
  • pistachios
  • roasted almonds
  • chocolate covered pecans
  • colby jack cheese
  • sharp cheddar
  • provolone
  • blue cheese
  • brie
  • pepperoni
  • prosciutto
  • salami
  • marinated artichoke hearts
  • Kalamata olives
  • Spanish olives
  • assorted crackers


How to assemble your charcuterie board:

  • Start with placing any bowls of olives, sauces, or spreads on the board.
  • Next, place all meats.
  • Now add your cheeses.
  • Then add crackers or sliced bread.
  • Fill in with fresh and dried fruit.


My tips:

  • Lay parchment paper down first when using a tray.
  • Have both soft and hard cheeses.
  • Use both fresh and dried fruit.
  • Add variety with different colored and textured food.
  • Keep it simple if you’d like, with just meat, cheese, and bread. 


Have fun with your charcuterie board! Be creative and enjoy!


You can read my latest article in the link below. Check out Mustard Seed Sentinel for fantastic content.

https://www.mustardseedsentinel.com/post/meghan-s-corner-charcuterie-board