Food

Magic Bars

img_7748

If you are looking for a super easy and decadent dessert, or even if you are not looking, I’ve got a great one for you. These amazing bar cookies will satisfy your sweet tooth, and your neighbor’s too. There are countless versions of these awesome cookies, Hello Dolly Bars, Seven Layer Bars, and a few others. I went with the Disney inspired Magic Bars because I like the name. Call them whatever you like.

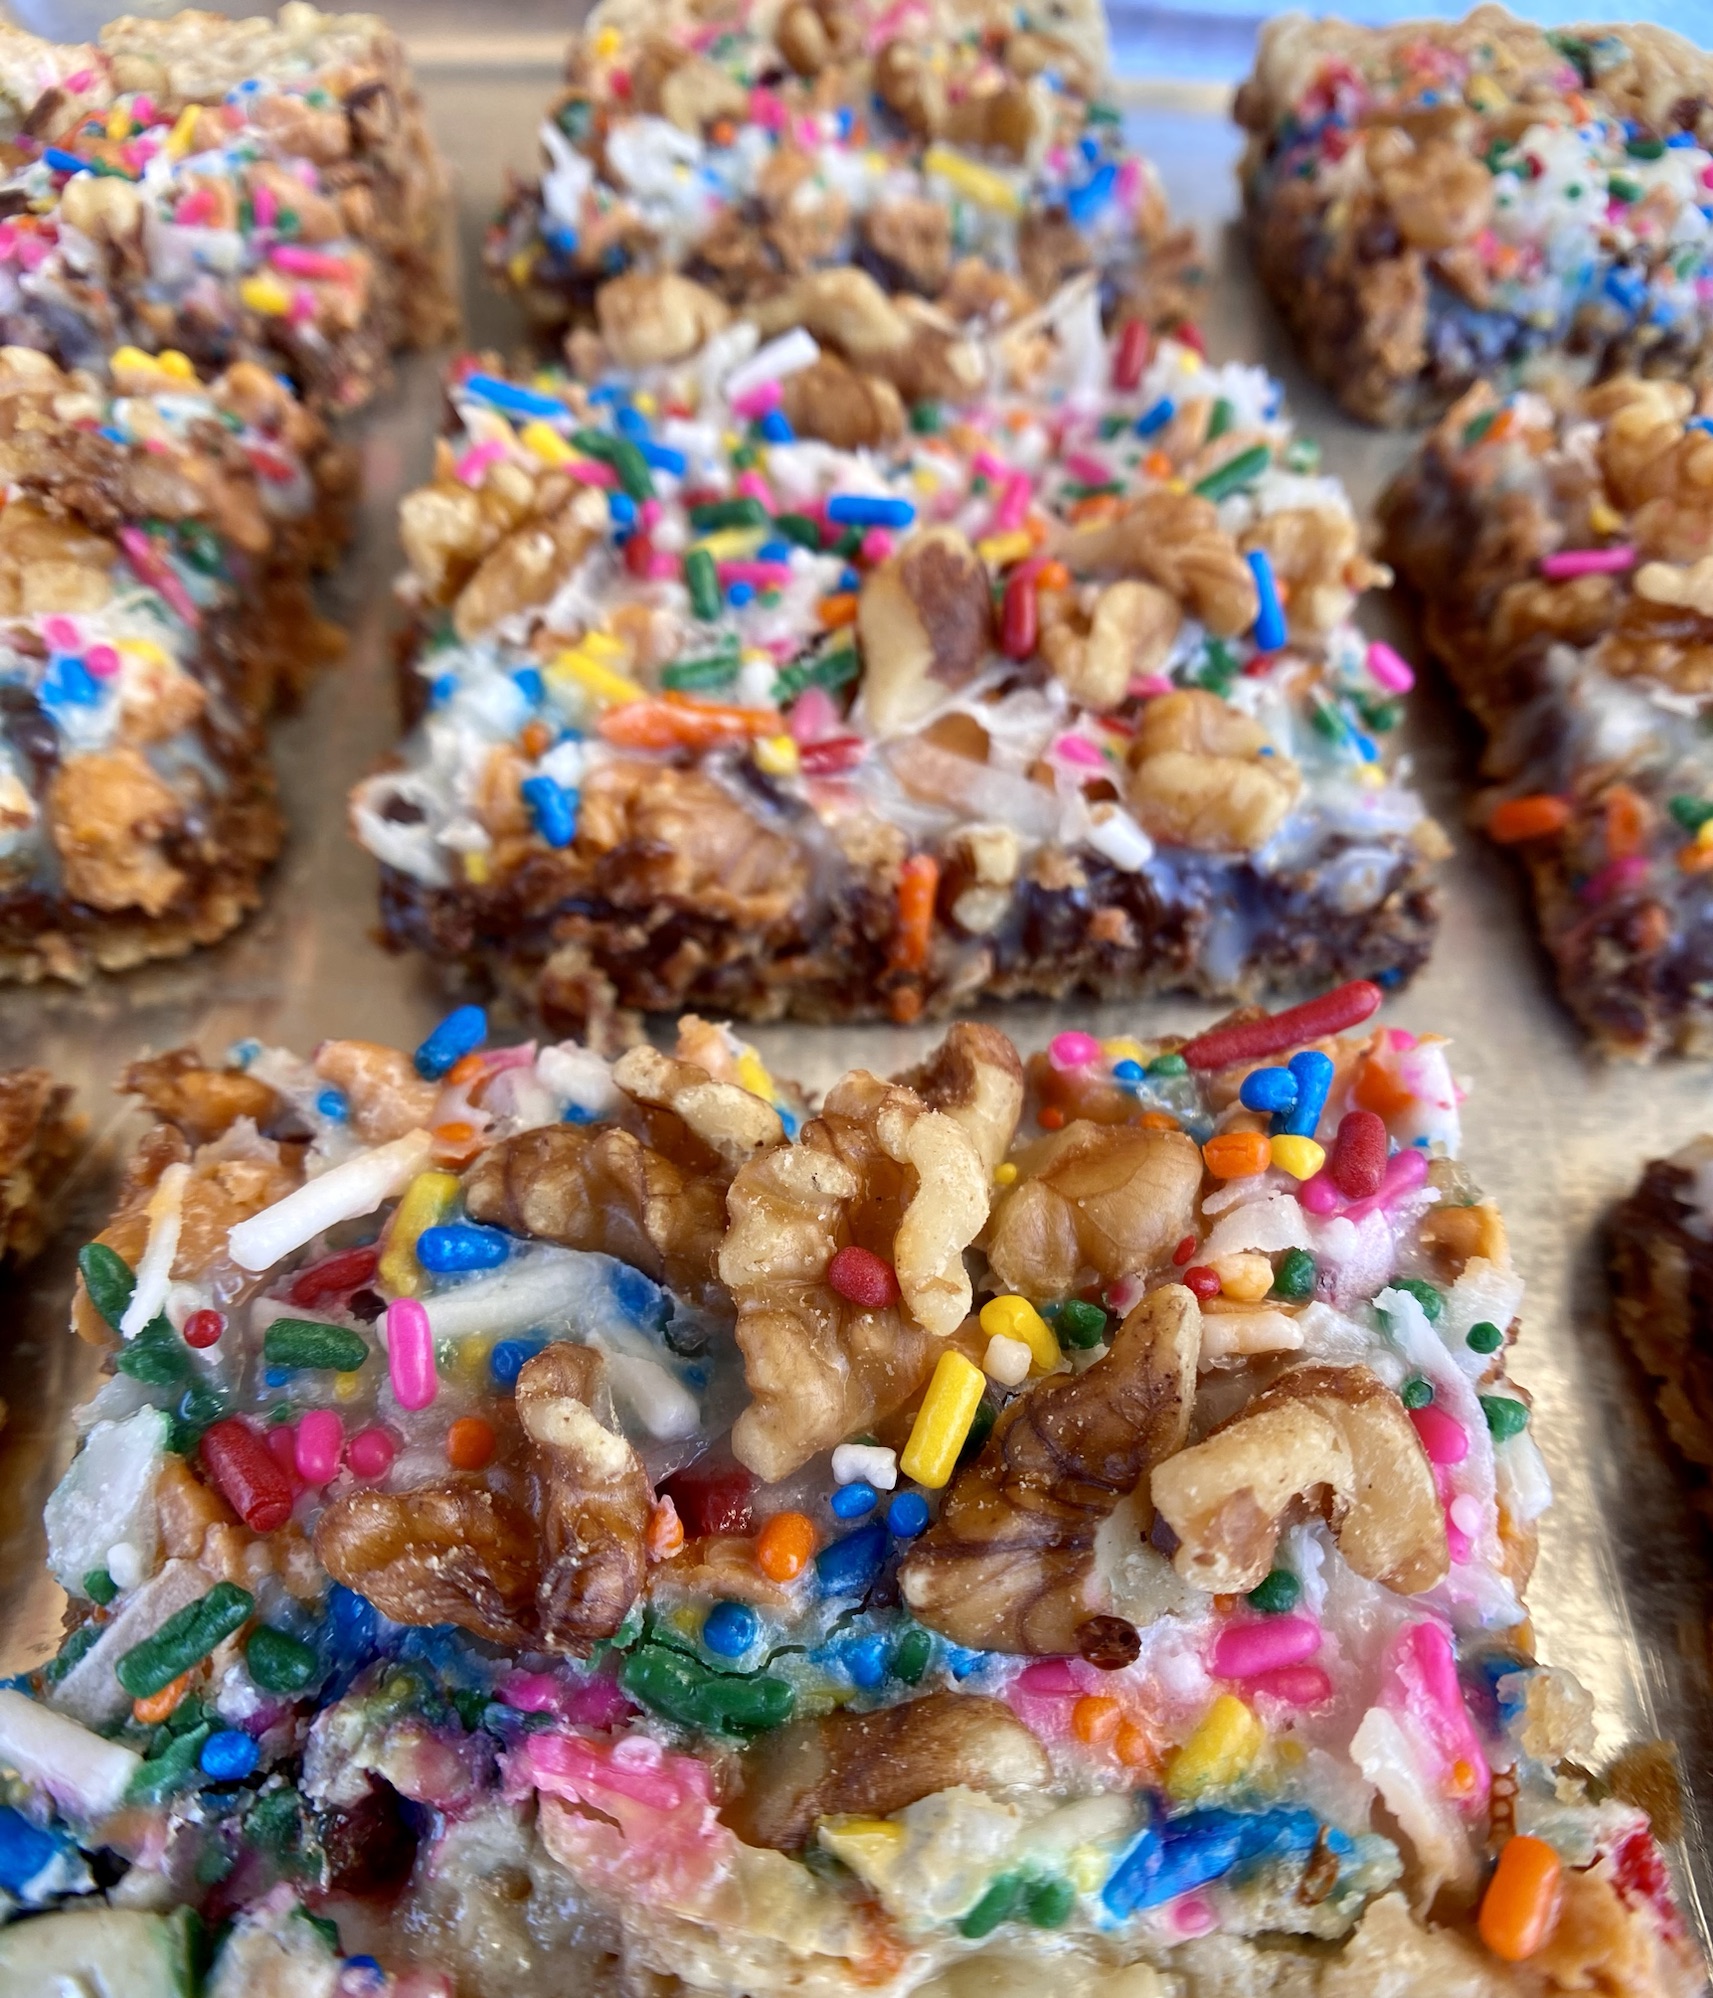
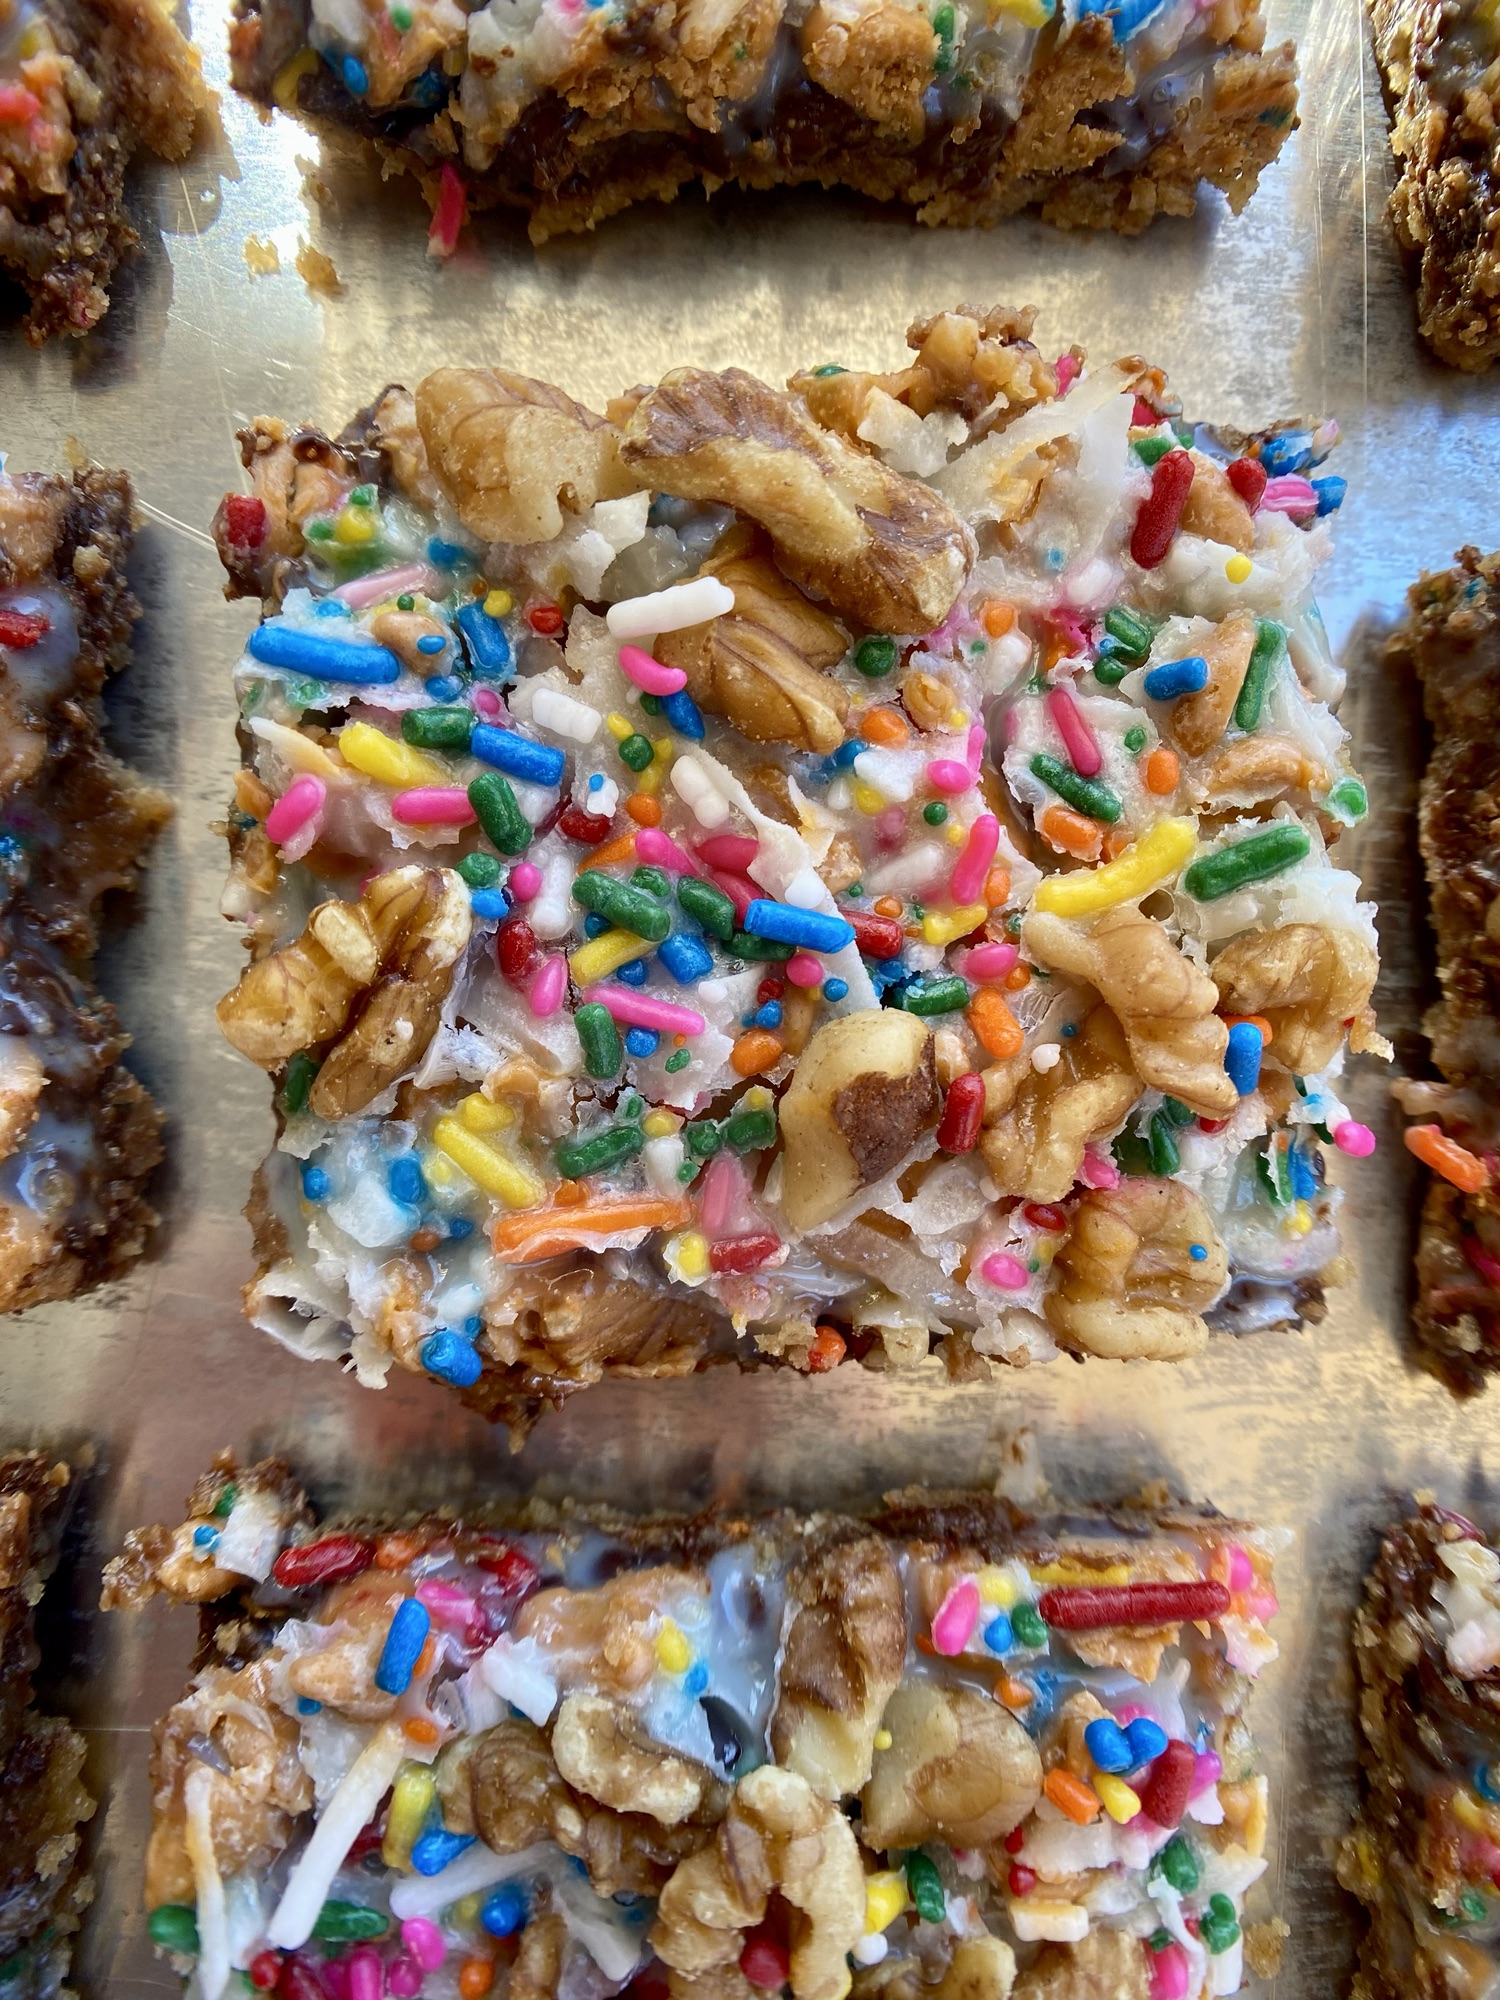
The fun thing about cookies like Magic Bars is you can customize them to your preferences. If you don’t like coconut, don’t add it. Use this recipe as your base and tweak it to your liking. Have fun with it. I added sprinkles because why not. 

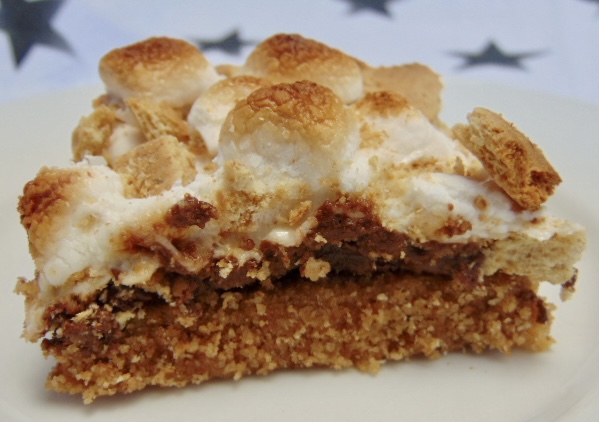
Magic Bars are effortless yet scrumptious. These uncomplicated cookies are soft and chewy like caramel with just the right amount of crunch. Your hunger for something sweet will be gratified with this lovely treat. Enjoy!

Happy Eating!

I will give thanks to the LORD with all my heart; I will tell of all Your wonders. Psalm 9:1

dsc01110-1

Magic Bars 

Ingredients 

1 1/4 cup graham cracker crumbs (approximately 9 graham crackers or 1 full sleeve)

1/2 cup melted butter (4 oz.)

6 oz. chocolate chips 

6 oz. butterscotch chips 

1 cup sweetened coconut flakes 

14 oz. can sweetened condensed milk

1/2 cup chopped walnuts

2 Tbsp. Jimmies sprinkles (optional)

Instructions 

  1. Preheat oven to 350°. Line a 9 x 13 pan with parchment or aluminum foil, or spray with cooking spray.
  2. In a small bowl mix the graham crackers and melted butter. Dump the mixture into the prepared baking dish and press into place with a measuring cup.
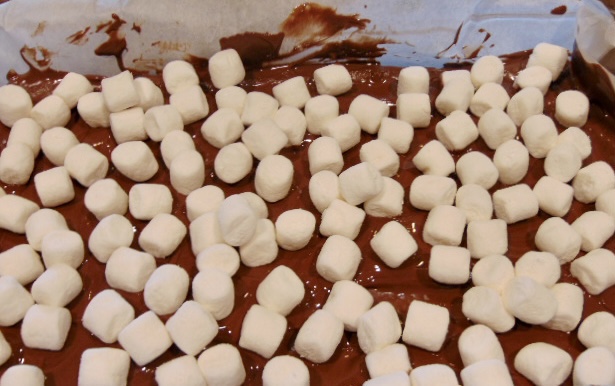
  3. Spread chocolate chips, butterscotch chips, and flaked coconut evenly on the crust. Pour entire can of sweetened condensed milk on top over everything.
  4. Add walnuts and sprinkles on top.
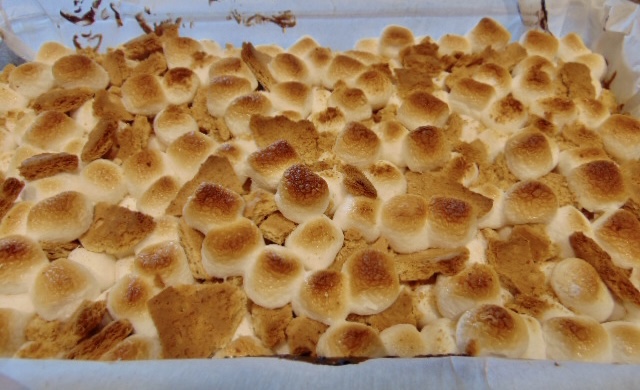
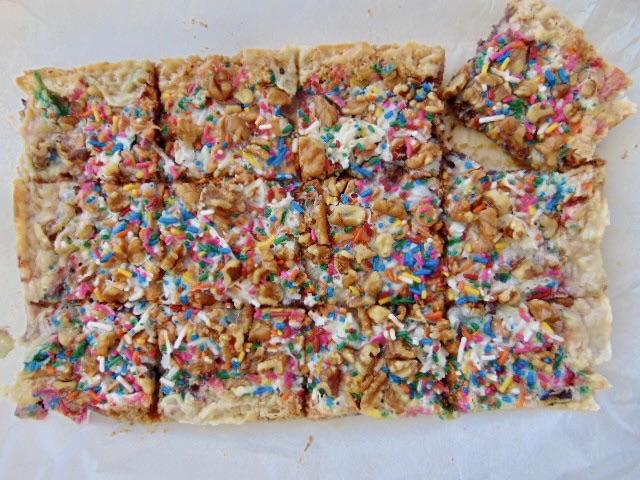
  5. Bake for 25-30 minutes until the edges are golden brown, and the filling is bubbly. Cool completely and cut into bars. Enjoy!

Notes: 

  • Cool by placing the bars in the fridge or freezer. They will be easier to cut if cool.
  • Use parchment or foil to easily remove from the pan and cut.
  • Magic Bars are very soft, especially when they first come out of the oven.
  • Use more or less coconut, or nuts to your preference.

img_7749

Food

Apple Crisp

dsc01083-1

The smell of cinnamon and butter fills the air as the apple crisp cooks in the oven. It gives all the fall feels with each warm, crunchy, sweet bite. You get the goodness of an apple pie, without the fuss of making a pie crust. The most time consuming part of making this dessert is peeling and slicing the apples.

Use your favorite apples. I have made this with galas, honey crisp, and Granny Smiths. All are good, just depends on your preference. Pecans or walnuts would be a wonderful addition to the topping for some extra crunch and flavor.

For a simple delicious fall bake apple crisp is a winner. Your taste buds will thank you for taking the time to make this satisfying treat. Top it off with a scoop of vanilla ice cream for perfection on a plate.

Happy Eating!

Keep me as the apple of Your eye; Hide me under the shadow of Your wings, Psalm 17:8

dsc01070-1

Apple Crisp

Filling

6 apples peeled, cored, and sliced or chopped

2 tablespoons lemon juice

1 teaspoon cinnamon

2 tablespoons granulated sugar

Topping

1/2 cup all purpose flour

1 teaspoon cinnamon

3/4 cup brown sugar

1/2 cup cold cubed butter

1 cup old fashioned oats

Instructions

  1. Preheat oven to 350°.
  2. Butter a 2.5 quart baking dish.
  3. In a large mixing bowl add the apples, lemon juice, cinnamon, and sugar. Toss until evenly combined.
  4. Place prepared apples in buttered casserole dish.
  5. In a medium bowl add flour, cinnamon, brown sugar, butter, and oats. Using a pastry cutter, or your hands, mix together until it gets crumbly. Spread evenly over the apples.
  6. Bake for 45 minutes until the topping is golden brown and bubbly.
  7. Let cool for a few minutes before serving. It’s best enjoyed warm.

Notes

  • Store apple crisp covered in the refrigerator for up to 4 days.
  • To reheat bake in a 350° oven for 25 to 30 minutes, until warm.
  • You can also warm up individual servings in the microwave.

dsc01066-1

dsc01067-1

dsc01068-1

dsc01071-1

Food

S’mores Bars

dsc00871

I love s’mores. When our kids were little, camping was a summer tradition that included campfires and s’mores. There is something so heavenly about toasted marshmallow and chocolate sandwiched between two graham crackers. Kuddos to a Girl Scout troop leader, from many years ago, for creating this lovely treat. It’s now a classic.

I have been experimenting with these wonderful bars since last summer. I wanted all the goodness of a s’more without the use of a campfire. After many attempts and tweaks, I feel good about sharing this winning dessert with all of you. It’s so simple, yet full of the perfect amount of sweetness to put a smile on your face.

No fire is required, just the heat of your oven. The Hershey chocolate bar is essential to get that nostalgic taste. Feel free to use chocolate chips if you prefer. Use as much or as little marshmallows. Tweak the toppings to your liking. Bring this to a barbecue or a potluck for a fun treat. To all my s’more loving friends out there, you will love this one. Enjoy!

Happy Eating!

Blessed are the peacemakers: for they shall be called the children of God. Matthew 5:9

dsc00875

S’mores Bars

Ingredients

3/4 cup salted butter ( 12 tablespoons) softened

1/2 cup granulated sugar

1/2 cup brown sugar

1 egg yolk

2 sleeves of graham crackers ( use 14 for the crust and the remaining 4 crackers for the topping)

6 Hershey chocolate bars (regular size)

10 oz. bag of mini marshmallows

Instructions

  1. Preheat oven to 350°. Line a 9 x 13 pan with parchment or aluminum foil.
  2. Place 14 graham crackers for the crust in a food processor to make fine crumbs. Break up 4 graham crackers into bigger chunks and save for the topping.
  3. Using a hand mixer, cream butter and sugars. Add the egg yolk, and the graham cracker crumbs. Mix until combined. Press the crust mixture evenly into pan.
  4. Bake crust for 20 to 25 minutes, until lightly brown. Let cool for 5 minutes.
  5. Place 6 Hershey bars on the hot crust. As the chocolate melts use a rubber spatula to spread out evenly.
  6. Sprinkle approximately 1 to 2 cups of the marshmallows on the melted chocolate. Now sprinkle about half of the broken graham cracker crumbs on top. Add another 1/2 to 1 cup of marshmallows on top of that. Now add the remaining graham cracker crumbs.
  7. Change the oven to broil on low. Put the bars under the broiler for 2 to 3 minutes depending on how toasted you want the marshmallows. Stay by the oven and watch. Marshmallows can burn quickly. Let cool. Cut into bars and enjoy!

Notes:

  • Place the warm bars in the fridge to speed up cooling.
  • Spray a knife with cooking spray for easier cutting.
  • Store at room temp to keep the marshmallows soft.
  • Extend the foil or parchment over the edge of the baking dish and then pull the bars out when you are ready to cut.
  • Use as much or as little marshmallows as you prefer.
  • If you don’t have a food processor, use a freezer bag and a rolling pin to smash the graham crackers.

dsc00862

dsc00863

dsc00864

dsc00865

dsc00866

dsc00867

dsc00868

dsc00869

dsc00870

Food

Chocolate Lava Cakes

dsc00748

Have you ever had this delightful treat? What appears to be a regular chocolate cake is actually filled with a surprise of warm melted chocolate that comes flowing out like lava. It’s probably one of the funnest desserts to eat. It’s an experience that I highly recommend.

I have ordered lava cake at restaurants, and always assumed they were complicated to make. I was wrong. These little cakes are so incredibly good, and so easy to whip up, literally. Use a whisk for everything, no mixer is required. 

Make them ahead of time, and pop them in the oven whenever you are ready for an amazing chocolate dessert. Chocolate lava cakes would be great for Valentine’s Day, or any special occasion. These chocolaty molten filled goodies will make any ordinary day extraordinary.

Happy Eating!

So whether you eat or drink or whatever you do, do it all for the glory of God. 1 Corinthians 10:31

dsc00754

Chocolate Lava Cakes

Yield: 4 cakes

Required equipment: 6 ounce ramekins

Ingredients

4 oz. semi-sweet chocolate

1/2 cup butter

2 eggs

2 egg yolks

1 teaspoon pure vanilla

1/2 cup powdered sugar

1/4 cup flour

For ramekin prep:

1 tablespoon butter

cocoa powder for dusting ramekins

Optional toppings for the lava cakes:

powdered sugar

fresh berries

vanilla ice cream

whipped cream

Instructions

  1. Preheat oven to 425°
  2. Butter each ramekin and dust with cocoa powder.
  3. In a medium size bowl place the stick of butter with 4 oz. of chocolate. Heat in the microwave for 30 seconds, then stir. Continue heating the chocolate and butter for 30 second intervals until the chocolate is melted and smooth. Stir between each 30 seconds. Don’t overheat. Chocolate can easily burn.
  4. In a separate medium size bowl whisk the eggs and egg yolks. Whisk in the vanilla.
  5. Whisk the melted chocolate into the eggs.
  6. Whisk the powdered sugar and flour into the chocolate mixture until combined.
  7. Evenly divide the batter between the four ramekins and place on a baking sheet.
  8. Bake for 12-14 minutes until the sides are firm. The centers will be soft.
  9. Let the cakes sit for 1 minute. Turn the ramekins over on dessert plates to release the hot cakes. Sprinkle with powdered sugar. Enjoy!

dsc00731

dsc00737

dsc00740

Use good chocolate. I love to use Ghirardelli semi-sweet chocolate baking bars. They are 4 ounces, and can be found at any grocery store. You can use regular chocolate chips and the cakes will still turn out good, but better quality chocolate improves the taste by a lot. 

Use room temperature eggs. Let your eggs sit out for a bit before you start preparing the cake batter. You will get better volume in your eggs which helps make a light fluffy batter. 

Use salted butter. I use salted butter for all of my baking. If you prefer unsalted butter, just add a pinch of salt to the batter.

Lava cakes can be reheated. Heat leftover cakes in the microwave for 30 seconds to get that yummy lava flowing again. Or, place in a 350° oven on a baking sheet upside down for 10 minutes.

dsc00744

Food

Pumpkin Bars

FullSizeRender (1)

It’s that time of year. Pumpkin time. Pumpkin everything is everywhere. It wasn’t that long ago that the only big thing happening pumpkin-wise this time of year was the now infamous pumpkin spice latte. If you got your hands on one of those, then you felt pretty special. Now, pumpkin has taken over all aspects of food from yogurt to cereal, and even candy. We are pumpkin obsessed for some reason. For the non-pumpkin eaters, I’m sorry. For the rest of us, yay!!

In honor of all things pumpkin, I give you pumpkin bars. You’re welcome. I’ve been making these divine treats for close to twenty-six years. The bars are really more like a moist delicious cake. The pumpkin flavor is there, but it’s subtle, not overpowering. And, the piece de resistance, cream cheese frosting. The combo of the scrumptious cake and sweet icing make this dessert irresistible. It’s hard to stop at one. Pumpkin bars are addictive. You’ve been warned. 

I was blessed with this recipe from my boss all those years ago. She brought them into work one day and it was love at first bite. I got the recipe from her, which she was given by her mother many years before. And the circle of life continues as I pass this fantastic recipe on to you. Maybe you will share it with someone in your life too. Whenever I make these for potlucks or any event, they get devoured every single time. So be ready with the recipe, because you will be asked. 

Pumpkin bars are a nice alternative to pumpkin pie at Thanksgiving. Or, if you’re feeling really adventurous, make both. Pumpkin fans everywhere will rejoice. I have to admit that I’ve made these in the summer. I know. It’s a bit bold, a bit daring, but so worth it. Try pumpkin bars in the off season too. They are just that good.

Happy Eating!

So whether you eat or drink or whatever you do, do it all for the glory of God.  1 Corinthians 10:31


Pumpkin Bars


2 cups flour

2 tsp. baking powder

2 tsp. cinnamon

1 tsp. baking soda

¼ tsp. salt

In a medium sized mixing bowl whisk together dry ingredients and set aside.


4 eggs

1 2/3 cup sugar

1 15oz. can pumpkin

1 cup vegetable oil

pecans or walnuts, chopped (optional)


  1. Preheat oven to 350 degrees.
  2. Cream eggs and sugar.
  3. Add the vegetable oil, pumpkin, and pecans.
  4. Add the flour mixture and mix thoroughly with a hand mixer.
  5. Pour into an un-greased 15x10x1 inch pan. Bake for 25 to 30 minutes or until golden brown.
  6. Cool completely before frosting. 

Cream Cheese Frosting

3 oz. cream cheese softened

¼ cup butter softened 

1 tsp. vanilla

2 cups powdered sugar

Cream together with a hand mixer until smooth.


Notes:

Store at room temperature in a sealed container.

I never add the nuts, but I’m sure it’s delicious. 

Let the cream cheese and butter soften at room temperature before making the frosting.