If you love peppermint like I do, then you will enjoy this very simple holiday treat. This would make a great addition to a cookie platter, or a very nice homemade gift. I made it with a semi-sweet chocolate base and a white chocolate top, but you could just use one type of chocolate. I like the contrast of the two chocolates with the mint.
Need a last minute gift, or treat for a party? Peppermint bark will save the day. Delicious, chocolatey, minty goodness all in one super easy no bake dessert. Only four ingredients for this fantastic recipe. Here is my last minute gift to you.
Merry Christmas!
For unto us a Child is born, Unto us a Son is given; And the government will be upon His shoulder. And His name will be called Wonderful, Counselor, Mighty God, Everlasting Father, Prince of Peace. Isaiah 9:6

Peppermint Bark
Ingredients
1 bag white chocolate chips (11 oz.)
1 bag semi-sweet chocolate chips (11 oz.)
½ teaspoon peppermint extract
6 candy canes, crushed
Instructions
- Line a large baking sheet (9 x12, or larger) with parchment going up the sides of the pan.
- Put a freezer bag inside another freezer bag and place the candy canes inside. Break them into small pieces using a rolling pin. Set aside.
- In a small glass bowl put the semi-sweet chips. Microwave in 20 second intervals, stirring between until the chocolate is melted and smooth.
- Pour the melted semi-sweet chocolate onto the prepared baking sheet and spread out evenly using a rubber spatula. Place in the refrigerator for approximately 10 to 15 minutes, or until the chocolate is almost set.
- Melt the white chocolate in a small glass bowl while the semi-sweet chocolate layer is setting up in the fridge. Heat in the microwave for 20 seconds at a time, stirring in between until the white chocolate is melted and smooth. Stir in ½ tsp peppermint extract. Pour the melted white chocolate over the semi-sweet layer. Carefully spread out the white chocolate using a rubber spatula.
- Sprinkle the crushed candy canes over the white chocolate and gently press the candy canes into the chocolate.
- Refrigerate the bark until completely set, about an hour.
- Break into pieces and enjoy!
Notes
- The semi-sweet layer should be a little bit soft when you pour the melted white chocolate on top. This way the layers will adhere together. If the semi-sweet is completely set the two chocolate layers can separate.
- White chocolate chips are a bit temperamental and want to harden fast after melting. Work quickly so the candy canes will stick to the chocolate before it sets up.
- The microwave is the easiest way to melt the chocolate but a double boiler is ideal.
- My bark is thin since I used a large pan, spreading my chocolate thin. Use a smaller pan for thicker bark.
- Store bark in the refrigerator for up to 3 weeks. It can be left at room temperature for a few days, but it will get soft.

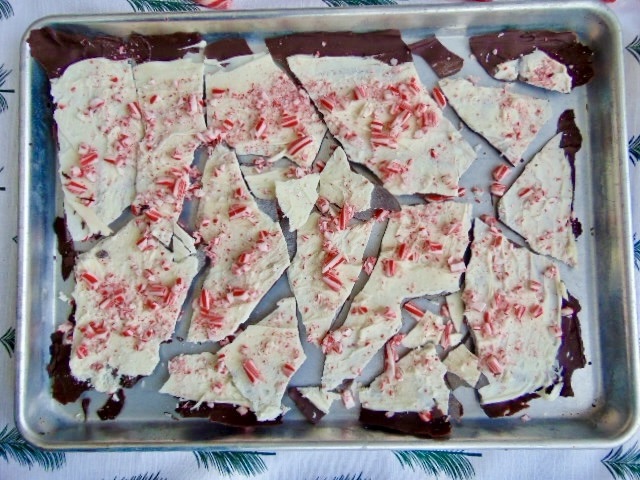
Photo Credits: Meghan E. White